
I’ve wanted to explore a disused tube station ever since I got interested in urbex and railways, but for a while I didn’t think I’d ever get the chance – over the past 15 years or so it’s become harder and harder to get into these places. So I was very excited when the London Transport Museum started running their Hidden London tours this year, covering several locations you don’t normally get to see. I booked tickets for Down Street (or rather my wife did as I was on a plane at the time the tickets went on sale). They were expensive, but I thought what the hell… some people would think nothing of spending that much money on clothes, or on going to gigs, or on going skiing, because that’s what they love. This is what I love and I’m going to treat myself.
Down Street Station was opened in 1907 on what is now the Piccadilly Line, one of the early deep level tube lines across London. It was never very heavily used, being tucked away down a side street in an area where most of the residents were too affluent to consider using the underground railways, and within only a few years some trains were already skipping it. It was closed completely in 1932 – the Piccadilly Line was being extended at both ends and some of the less used stations in the central section had to be closed to reduce journey times. By then the stations on either side of Down Street (Hyde Park Corner and Green Park, formerly Dover Street) had both been remodelled with entrances closer to Down Street than before, so losing this station wouldn’t have been a huge inconvenience.
The station remained as a ventilation shaft and emergency exit for the Piccadilly Line, but a few years later it also found a more interesting use: the Railway Executive Committee used it as a safe place to convene during World War II. The platforms were walled off from the railway and turned into offices and dormitories, with some of the pedestrian tunnels above becoming bathrooms and meeting rooms. New bomb-proof doors and gas locks were installed, and the lift shaft was capped off with concrete. Later in the war, Down Street was also used by the government including Winston Churchill himself, as it was very close to central London but deep enough underground to be safe from bombs.
Since the war, the station has reverted to its former function as a ventilation shaft and emergency exit. However, many of the modifications made during wartime still remain, which makes it one of the most interesting disused tube stations to visit. As well as the railway relics you would expect, there are also numerous wartime relics to see down there.
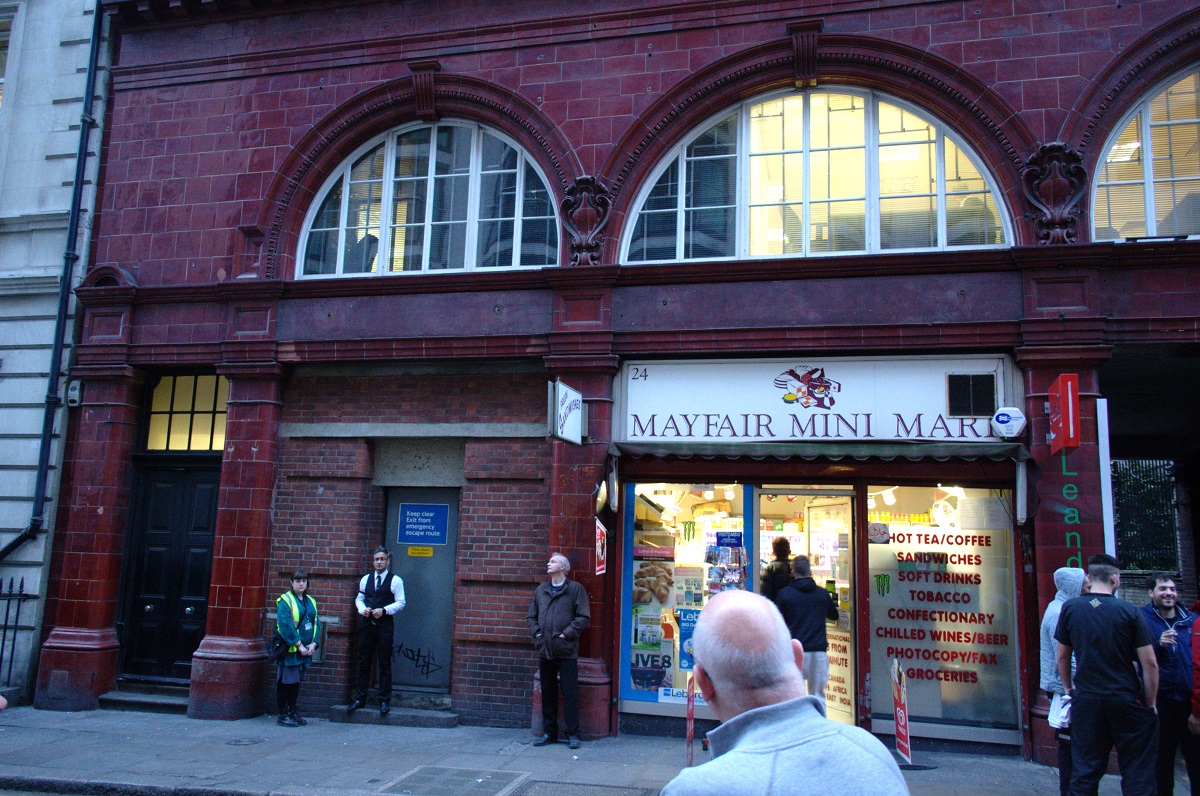
On our way to Down Street, we swung by another well known disused tube station: Aldwych, formerly known as Strand, so I could photograph the exterior:

Although there are no tours of Aldwych being run at the moment, I hope I get the chance to visit it some day. It’s a bit different from most of the other disused stations due to being at the end of a short branch line from Holborn, and looks very well preserved. But for now, back to Down Street.
The facade of Down Street Station still exists in the street of the same name. The station name was covered up long ago, but the building is still immediately identifiable as an old tube station due to its very distinctive style. After a short briefing and security check, we entered through an unremarkable looking door and began our descent into the depths. The ground level of the station building has changed out of all recognition since closure and most of it is now a newsagent’s, so there is little to see here – all the interesting stuff is down below.
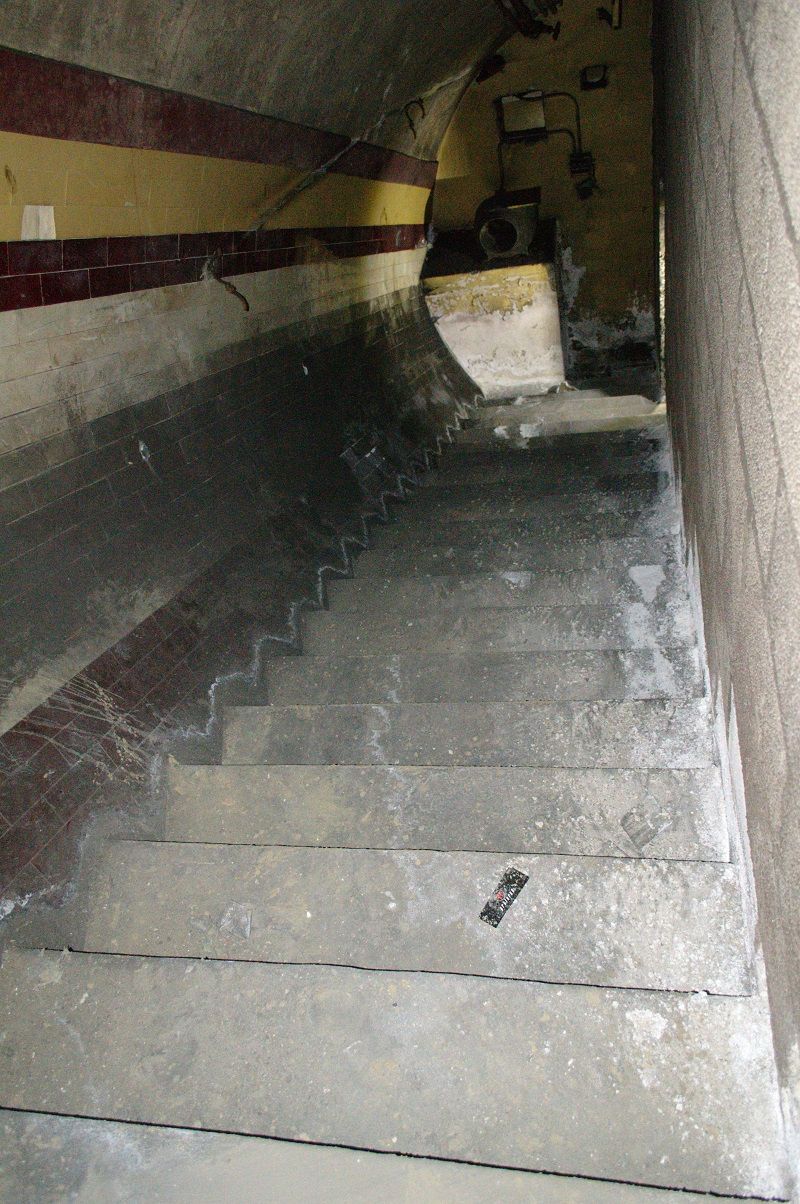
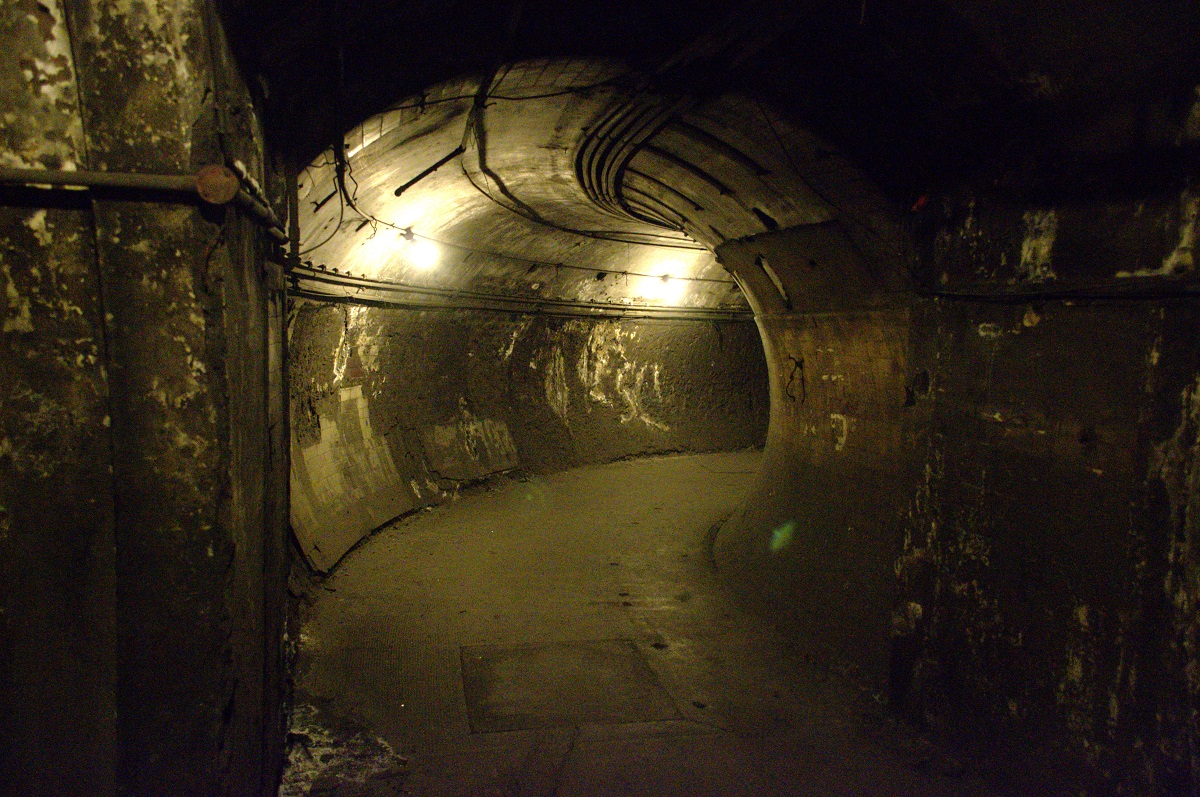
The layout of the lower levels of Down Street is slightly unusual. Although the two wide circular shafts down from street level, one containing an emergency spiral staircase and the other two lifts, were typical of tube stations at the time, Down Street has an extra passageway (its official name on the plans I’ve seen seems to be the “High Level Subway”) that ascends via a staircase and joins the emergency stairs about one storey up from the bottom. This was put in as an extra escape route due to concerns about the long length of the tunnels from the platforms to the shafts (a consequence of the surface building being down a side street while the actual railway line runs directly under the main road).
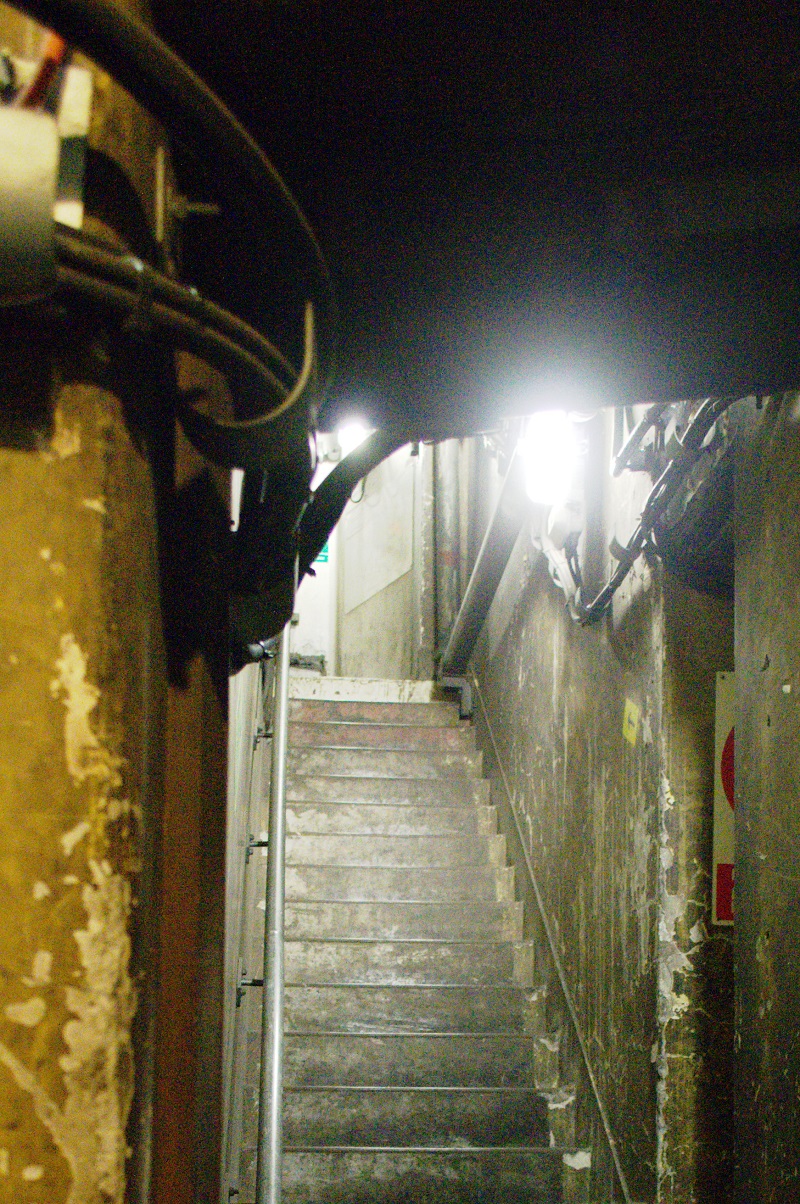
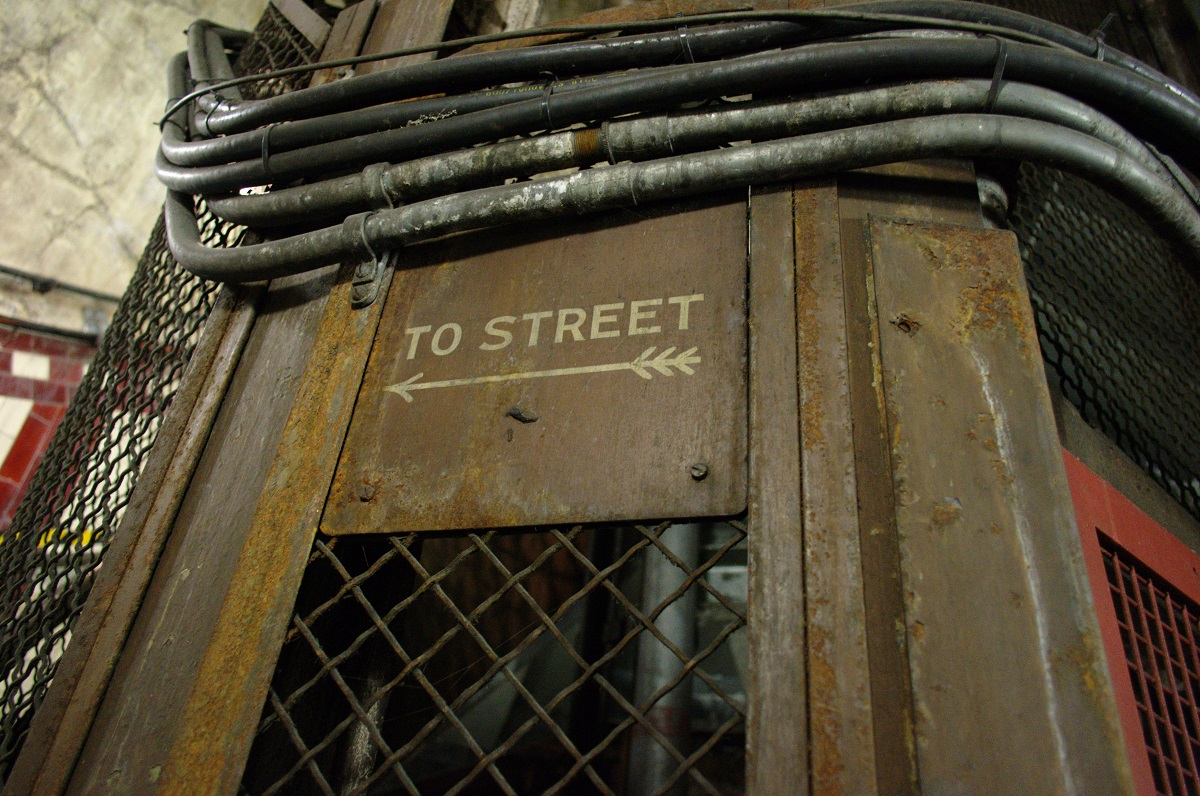
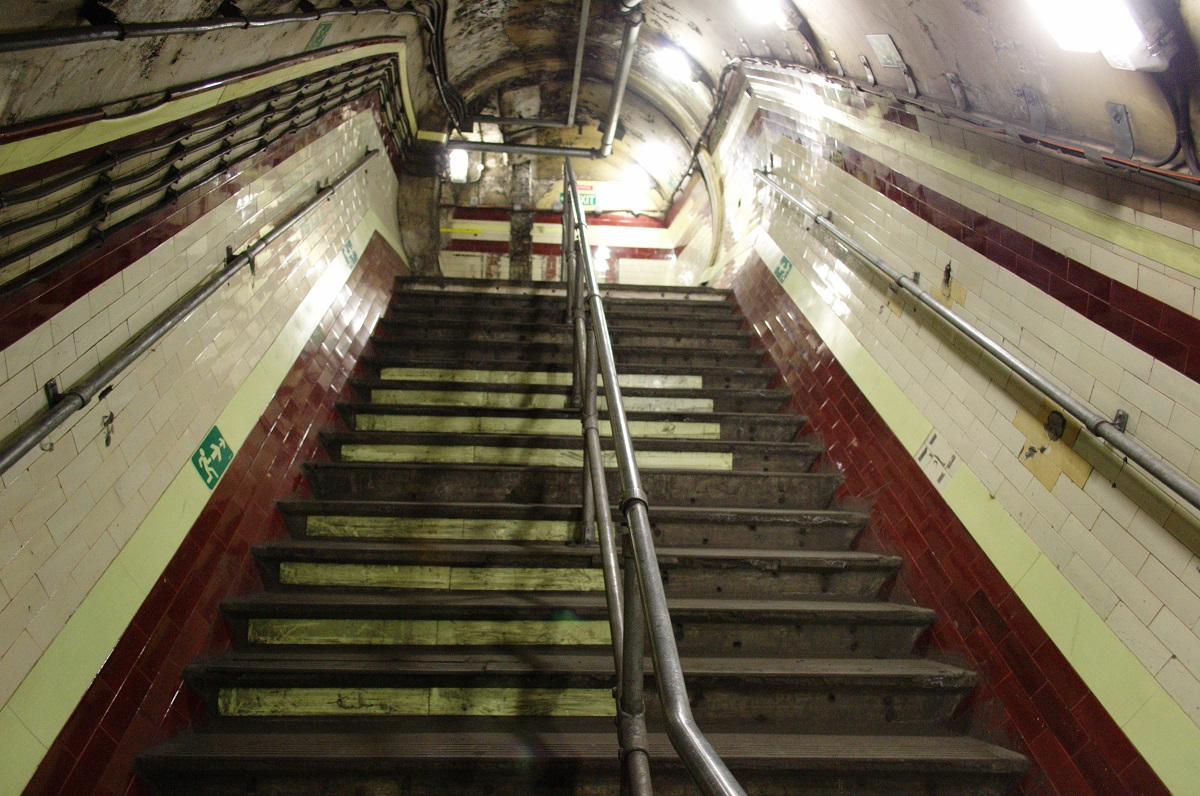
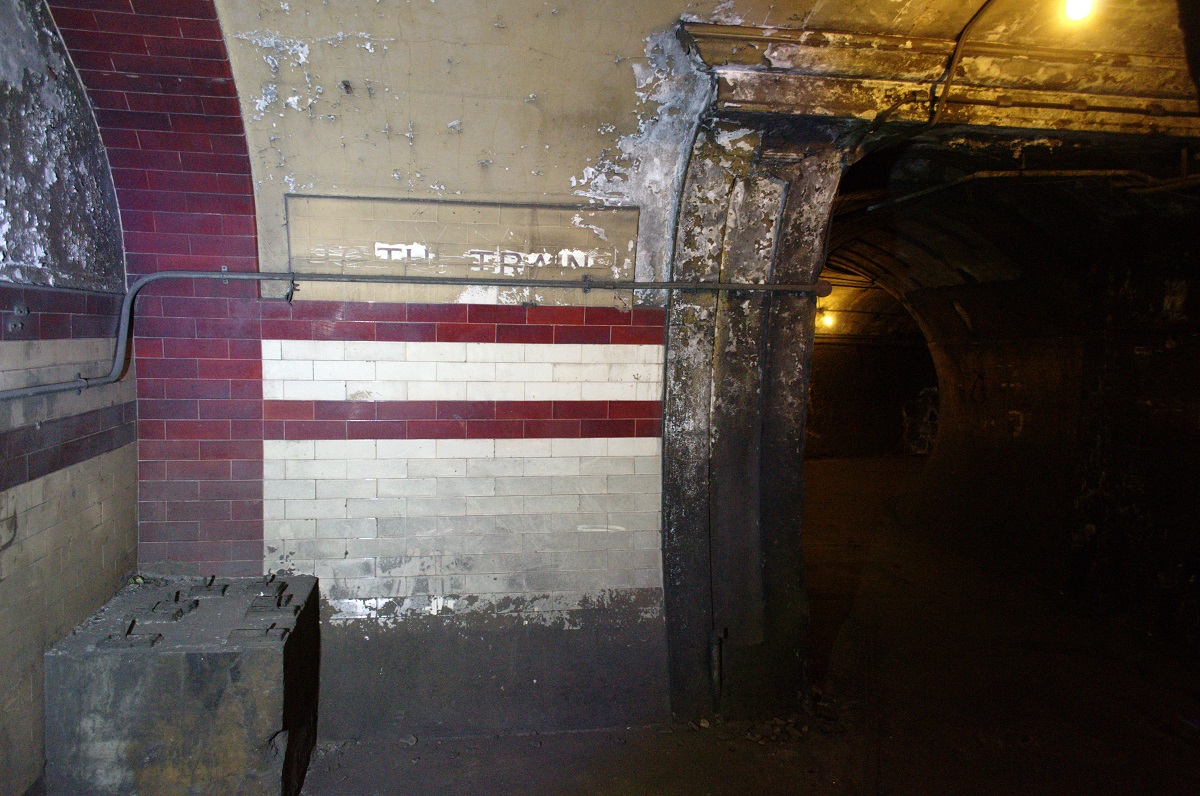
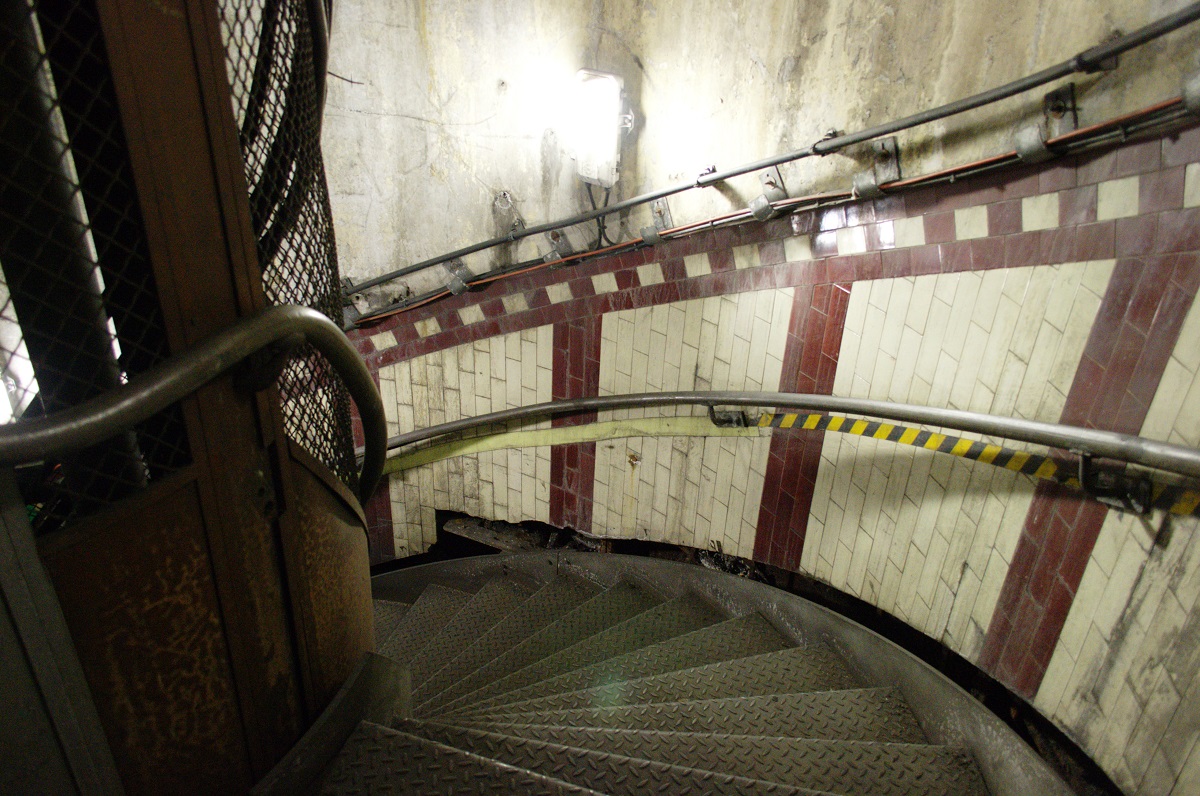
On entering the building, we first descended a short straight concrete staircase to a landing one floor down. The spiral emergency stairs led down from here, though there have been a few changes over the years: a small lift had been installed down the middle of the stairwell during the war years (as we’ll see later, the main lift shaft was blocked off at this time), and the stairs themselves have actually been replaced much more recently. Since they still serve as an emergency exit from the Piccadilly Line, they have to be kept in good order. On the wall of the shaft, some of the original station tiling in maroon and white survives, as well as notices pointing in the direction of the street.
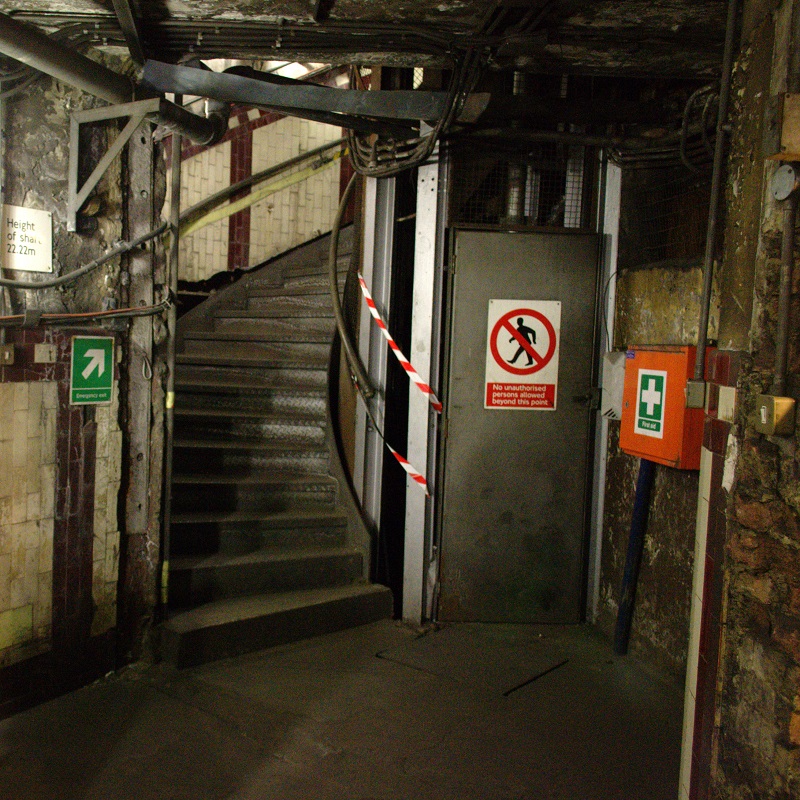
At the bottom of the main staircase, we emerged through a door that was converted into a gas lock during the war, to keep the occupants safe from any poison gas. A modern sign on the wall informed us that we’d descended 22.22 metres. Ahead of us was the further west of the two pedestrian tunnels down to the platforms, running straight for a short distance and then turning to the right. This area was converted into a typing pool during the war, and although the walls of this had long since been removed, a railing along the edge of a raised section of the floor showed how narrow the passageway outside the pool would have been (though apparently just wide enough for the essential tea trolley!).
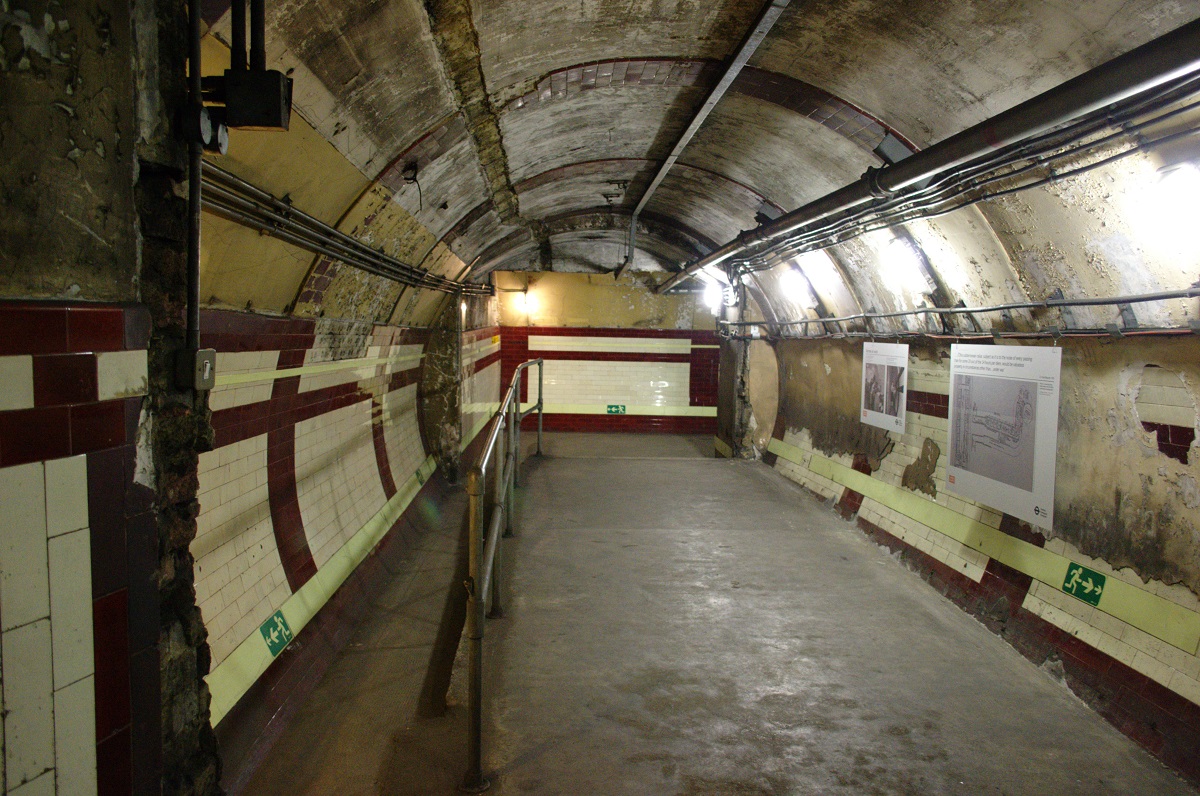
Around the corner from the typing pool, the next section of tunnel had previously been converted into a committee room where many important decisions were no doubt taken. Its walls and fixtures had also been removed, presumably so as not to obstruct the current emergency exit route, but the position of the table had been marked out on the floor, allowing us to get a feel for how the current layout related to the historical photo displayed on the wall.
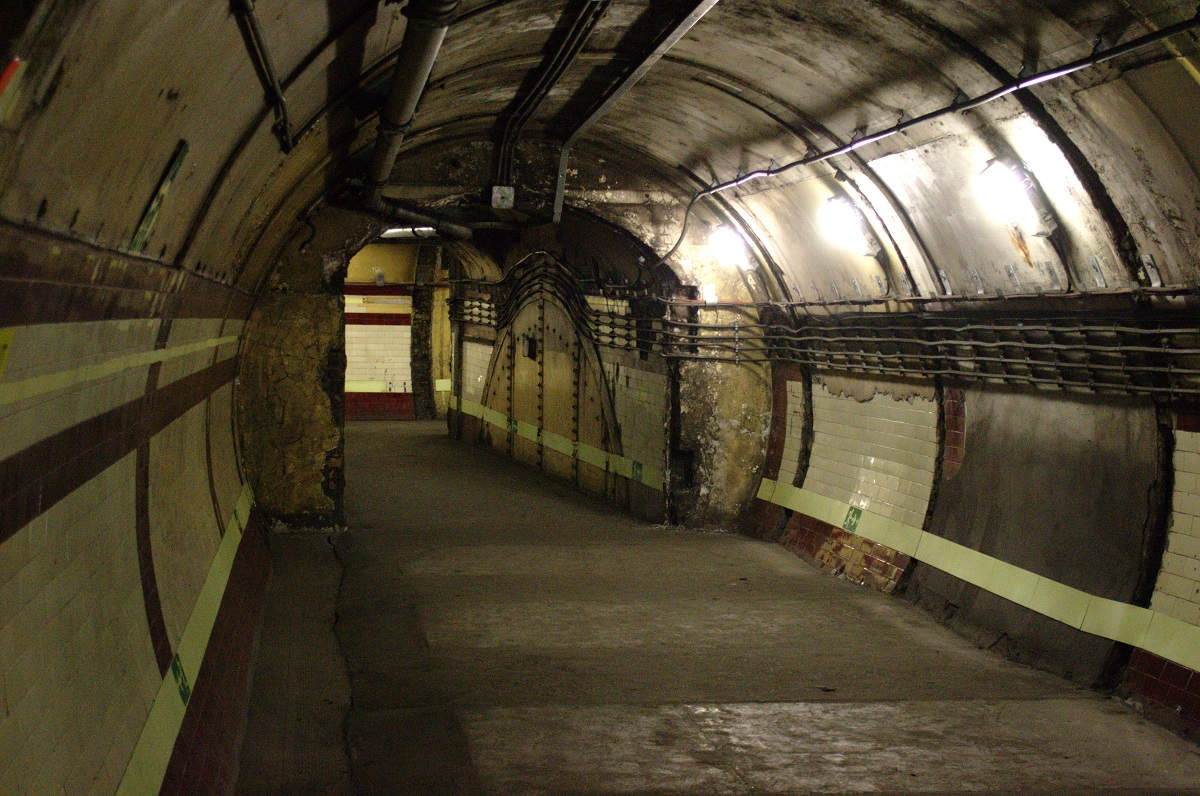
From the committee room we could see right along to where the tunnel narrowed to cross over the eastbound Piccadilly line, but we weren’t going that way quite yet. First, we took a detour up the “extra” corridor I mentioned above, which was through a narrow, dark opening in the left hand wall. From here, stairs ascended up a level and the “high level subway” led us back to the main stairwell. This whole area had been extensively modified for wartime use, but unlike the typing pool and the committee room, most of the modifications here survive to this day.
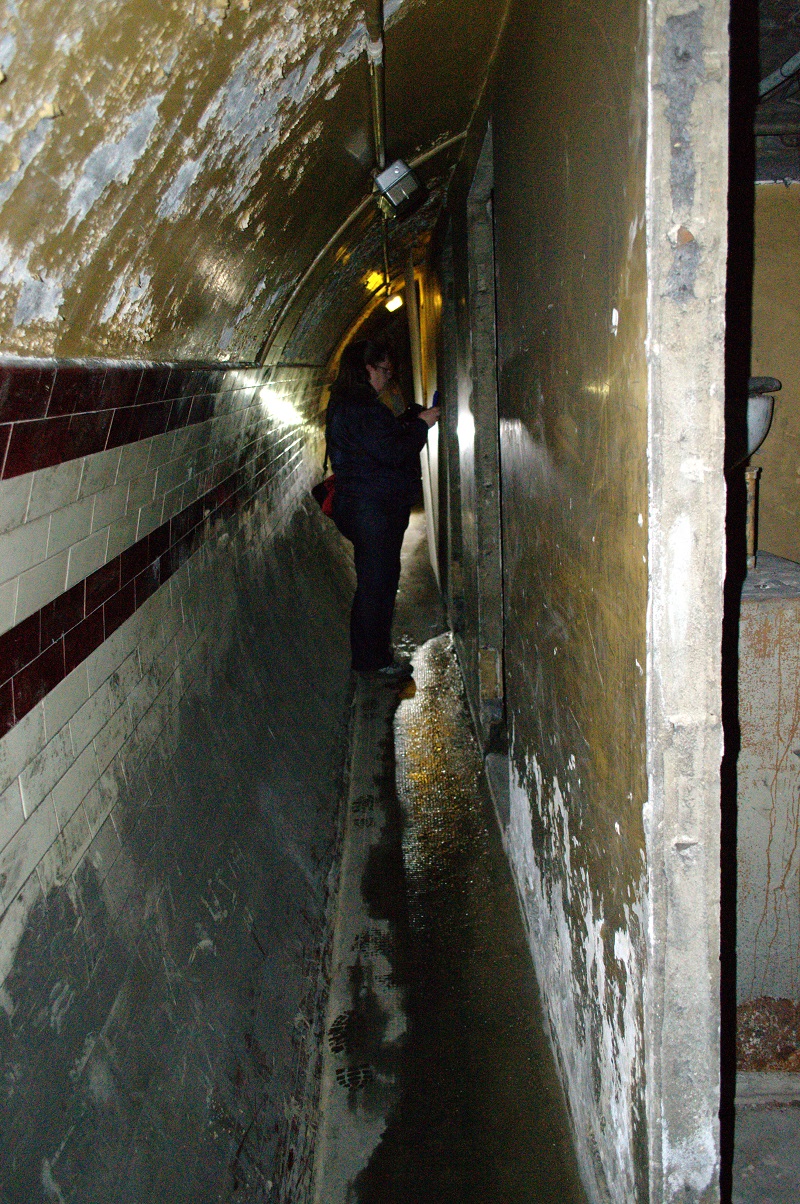
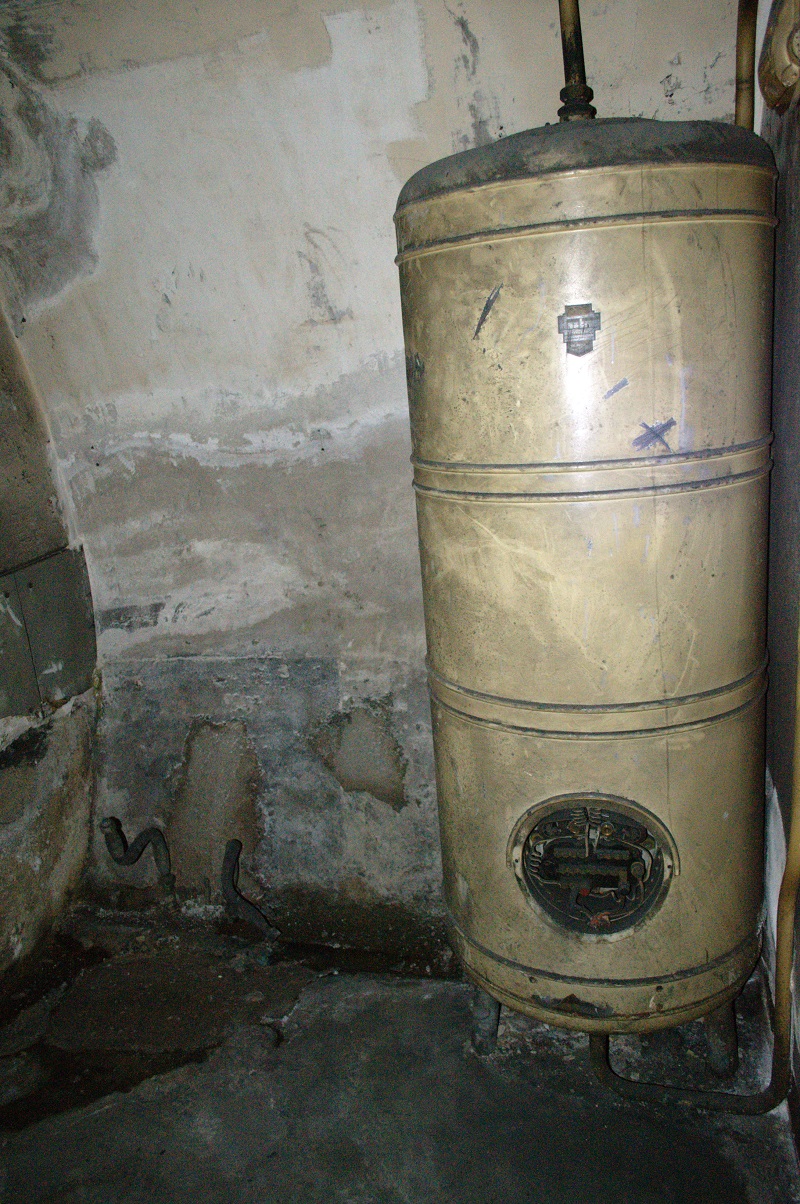
At the foot of the stairs were two cubicles that had once contained chemical toilets, and at the top were several rooms with more substantial bathroom facilities – people actually lived down here, so these would have been essential. The remains of baths, sinks, toilets and a tall cylindrical water heater could be seen in these rooms, all coated in a thick layer of dust. Unlike the corridors we’d walked through up until now, this area of the complex wasn’t lit and we were reliant on the torches we’d been handed at the start of the tour, and on our camera flashes (no tripods allowed on the tour, so flash and high ISO were needed rather than long exposures and light painting).
Curiously, the stairs themselves had also been partitioned right down the middle, with open doorways at the top and bottom giving access to the other half. It wasn’t clear why this had been done.
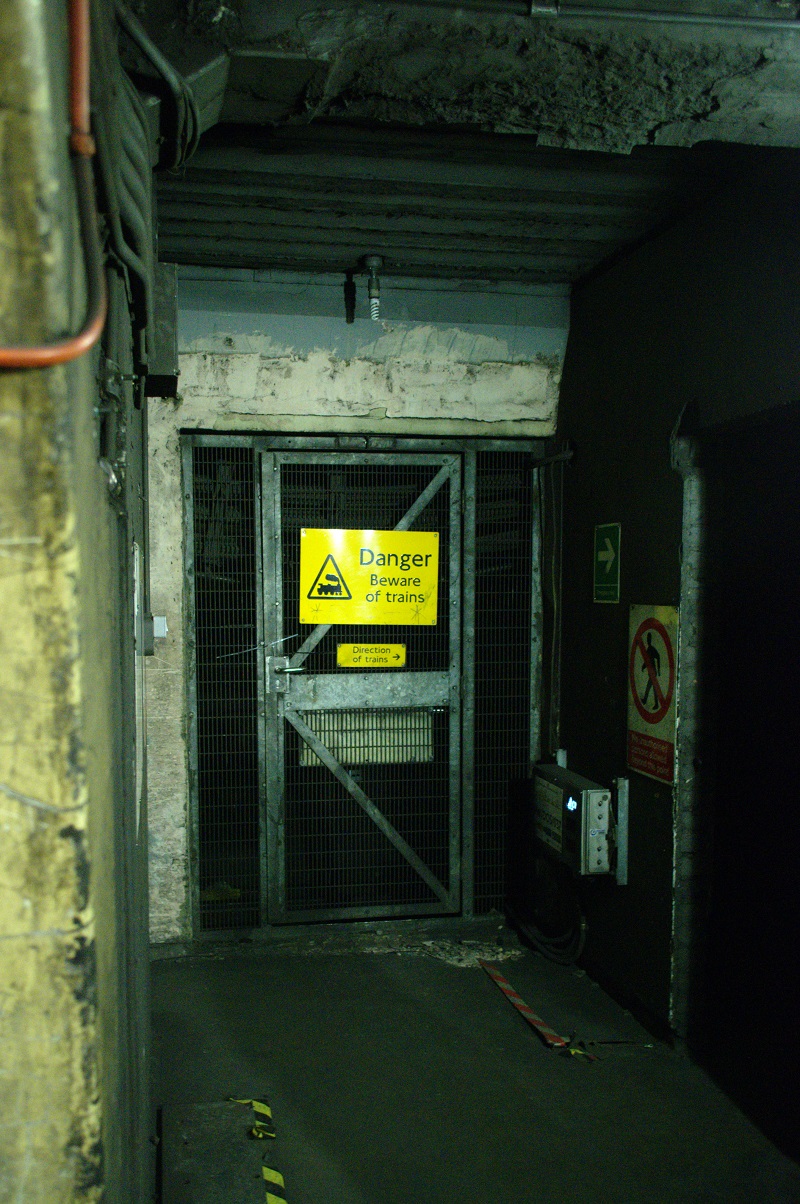
After descending back down to the bottom of the main stairs, we walked back through the typing pool and the committee room, this time continuing across the bridge and down the stairs to platform level. Down Street’s platforms were mostly bricked off from the running lines during the war, but at the bottom of the stairs there were metal mesh gates on either side so we could see Piccadilly Line trains hurtling past every few minutes. At one point while we were in this area, a train slowed down almost to a standstill and we could clearly see the passengers in one of the cars. I wonder if they could see us, and if so, did they know what we were doing?
On the wall facing the bottom of the stairs were signs informing us which platform to use for various destinations. They were obviously too new to date from before the station’s closure in 1932, and in fact listed several destinations that the line didn’t even go to in those days. They were actually put up fairly recently so that people working in the station would know which track was which.

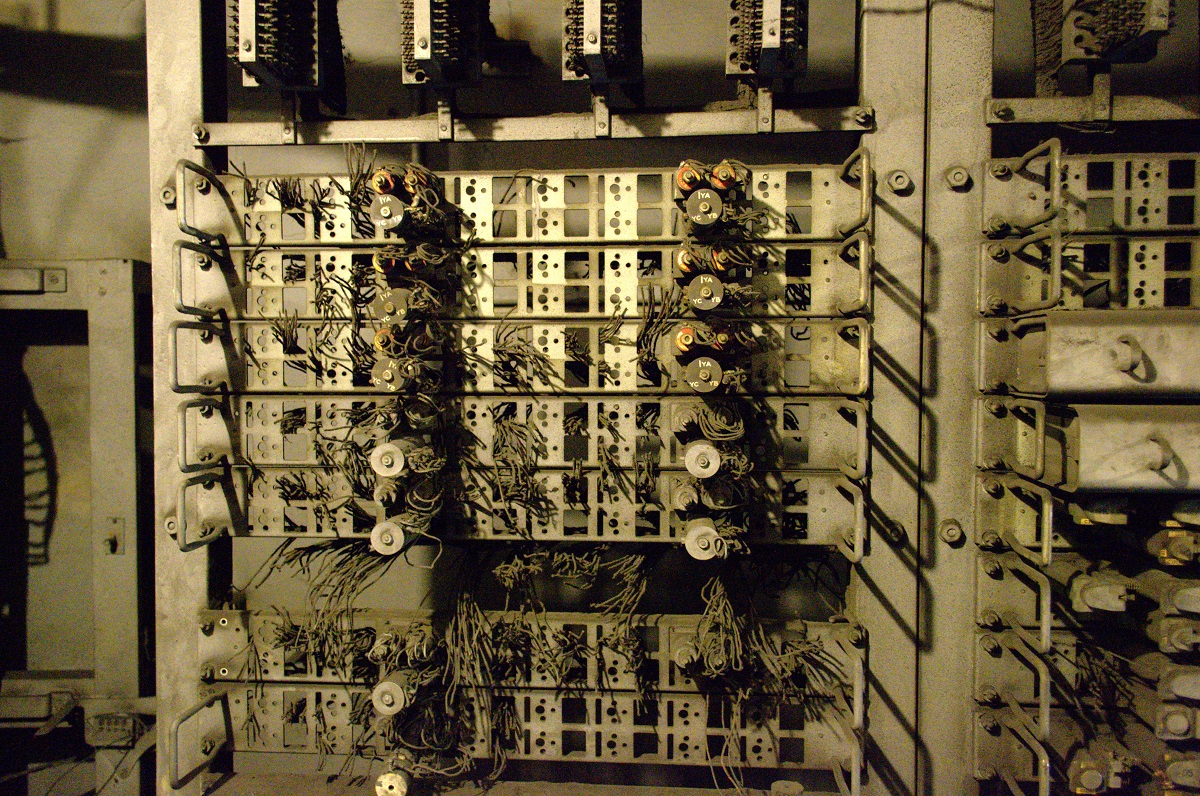
Once the platform edges had been bricked up, numerous rooms were built into the space created, with narrow corridors along one side to give access to them. This area was again very dark and flash photography wasn’t allowed so close to the live railway, so unfortunately I didn’t get so many usable photos down here, but it was still fascinating to see. We were first shown the telephone exchange at the west end of the eastbound platform, which provided 50 phone lines to the complex. A lot of the equipment for this was still in place.
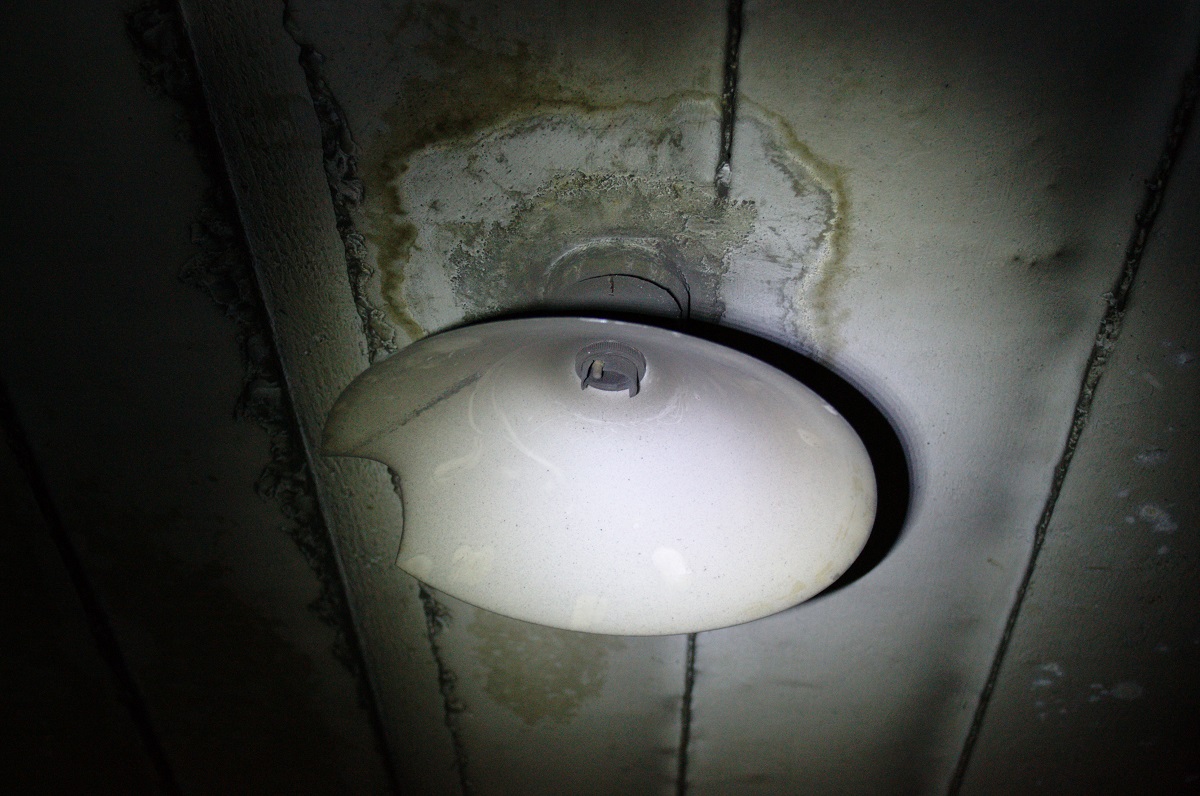
The tour then led back past the bottom of the stairs to the westbound platform, where we were shown various offices and dormitories, mostly empty now but with occasional signs of their past use. A grill in the ceiling of one office may have been part of Britain’s first functioning air conditioning system!
Towards the far end of the platform, we crossed back over to the eastbound platform again through what was once some sort of linen cupboard. There wasn’t so much to see on this platform as the former dormitories now house signalling equipment so we couldn’t go into them. We did, however, get to see the former kitchen and the two mess rooms further along.
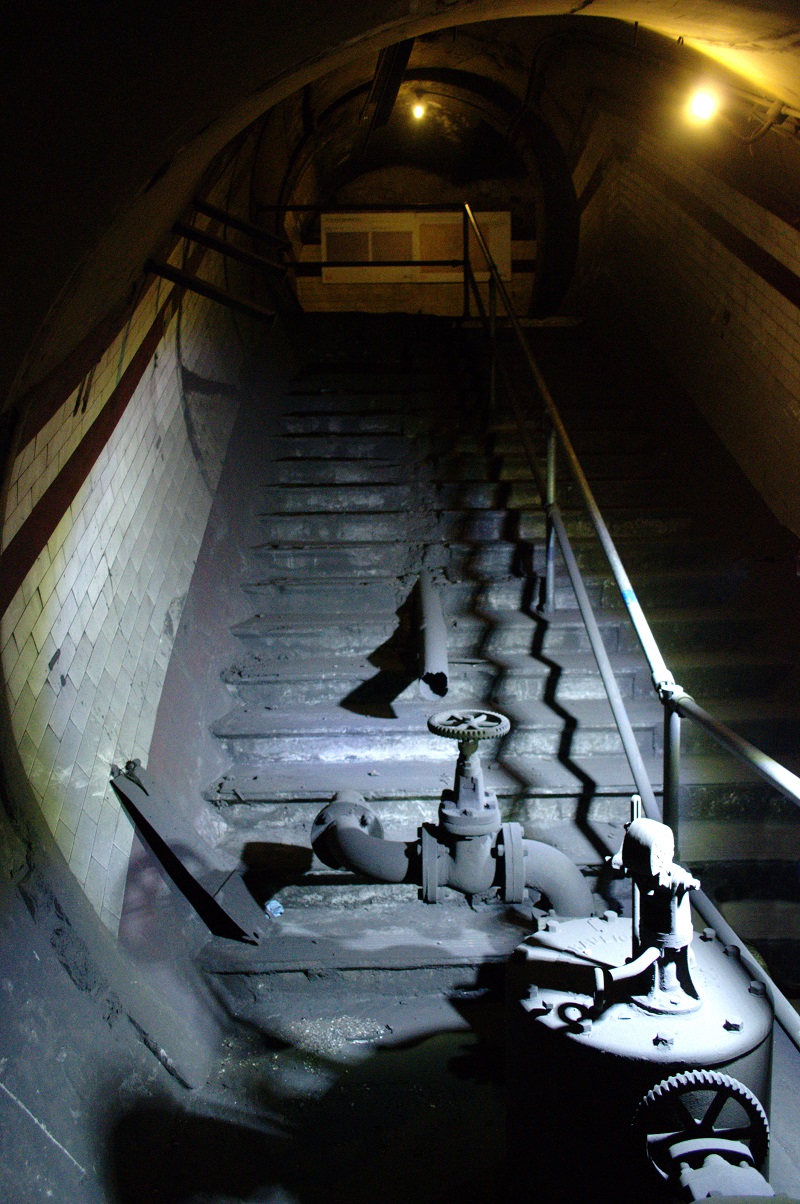
By this time, we’d almost done a complete circle of the platform level, but we had to retrace our steps slightly to get to our next destination: another staircase leading back up. This one was similar to the one we came down, with the incongruously modern destination signs and the metal gates giving a view of the passing trains, but with a few more features of interest: some very nice original station signs were just visible above the modern ones, and one side of the stairs had been fenced off with railings to create space for a sewage pump, which was still in place.
We ascended the stairs into the second pedestrian tunnel. The railway operators of the time wanted this one left free from development as it performed a valuable ventilation function, but some changes were in fact made to it during the war, including a brick lined alcove that was added near the top of the stairs. I hadn’t been sure whether this section would be included on the tour, so I was glad to find it was.
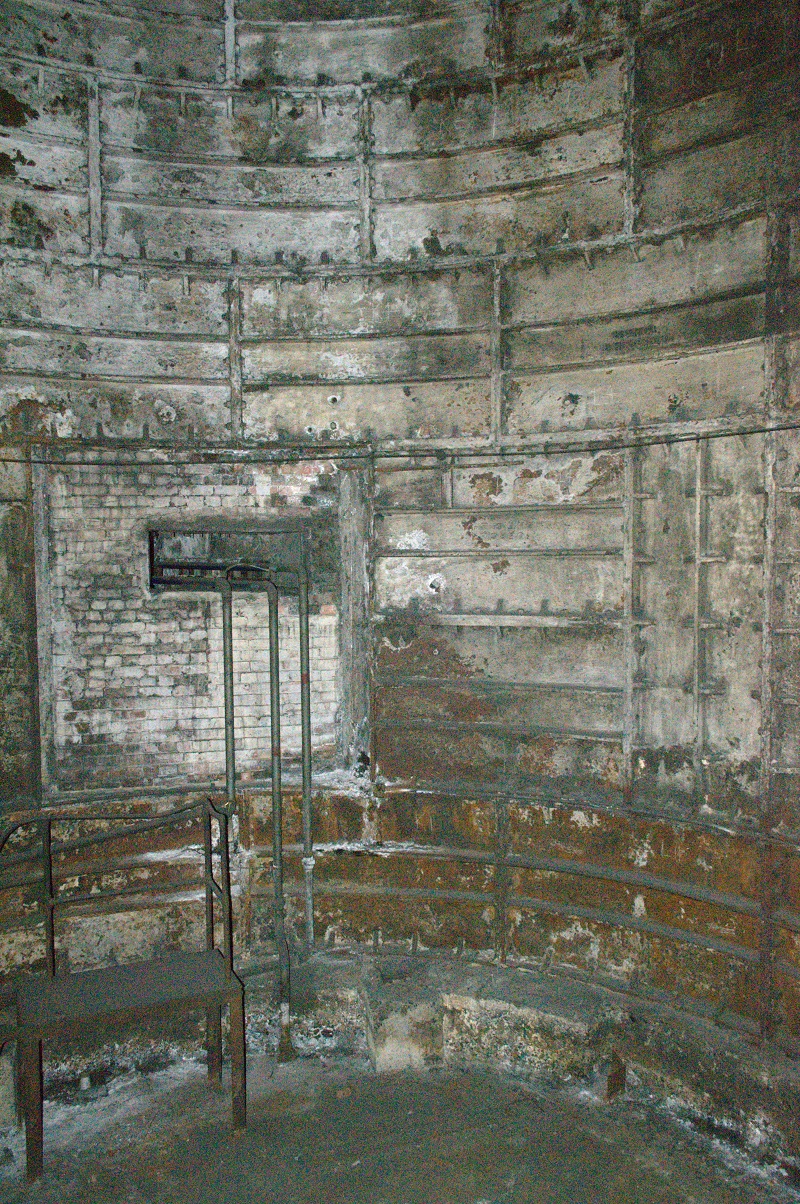
This second tunnel would probably have been the most used one originally, because it led straight to the lift shaft. This shaft has changed a lot in the intervening years: the lifts are long gone (as I mentioned a small lift in the centre of the stairwell was used instead during the war), and the shaft itself was capped off during the war to make it less vulnerable to bomb strikes, though ventilation was maintained through metal baffles that could be closed in the event of a gas attack. We were able to cross a walkway that leads across the bottom of the lift shaft, giving us a closer look at it.
Our tour was almost at an end at this point; all that remained was to thank the guides, climb back up to street level, hand back our torches, and collect our exclusive information packs, in tasteful brown folders with a “Top Secret” stamp.
All in all, it was an amazing couple of hours and I would highly recommend it. Already looking forward to my next Hidden London tour, whenever that turns out to be…
[…] Down Street Tube Station […]