
I signed off my Down Street Tube Station blog last December with the words “Already looking forward to my next Hidden London tour, whenever that turns out to be…”. As it happens, it turned out to be December this year, when I attended a photography tour of the disused tunnels at Euston Tube Station.
The Euston tour was a bit different from the Down Street one in several ways. Most obviously, Euston Tube Station is still in use, so rather than visiting a deserted ghost station, we were exploring hidden tunnels that threaded their way between the maze of active passenger, train and ventilation tunnels that make up the lower levels of Euston. Secondly, although I was pretty happy with the selection of photos I took in Down Street, the fact that the Euston tour was especially for photographers made things easier: there was more time to set up shots, fewer people wandering around getting in the way, and tripods were allowed this time which made getting decent photos in the dark tunnels a lot easier.
The Surface Building
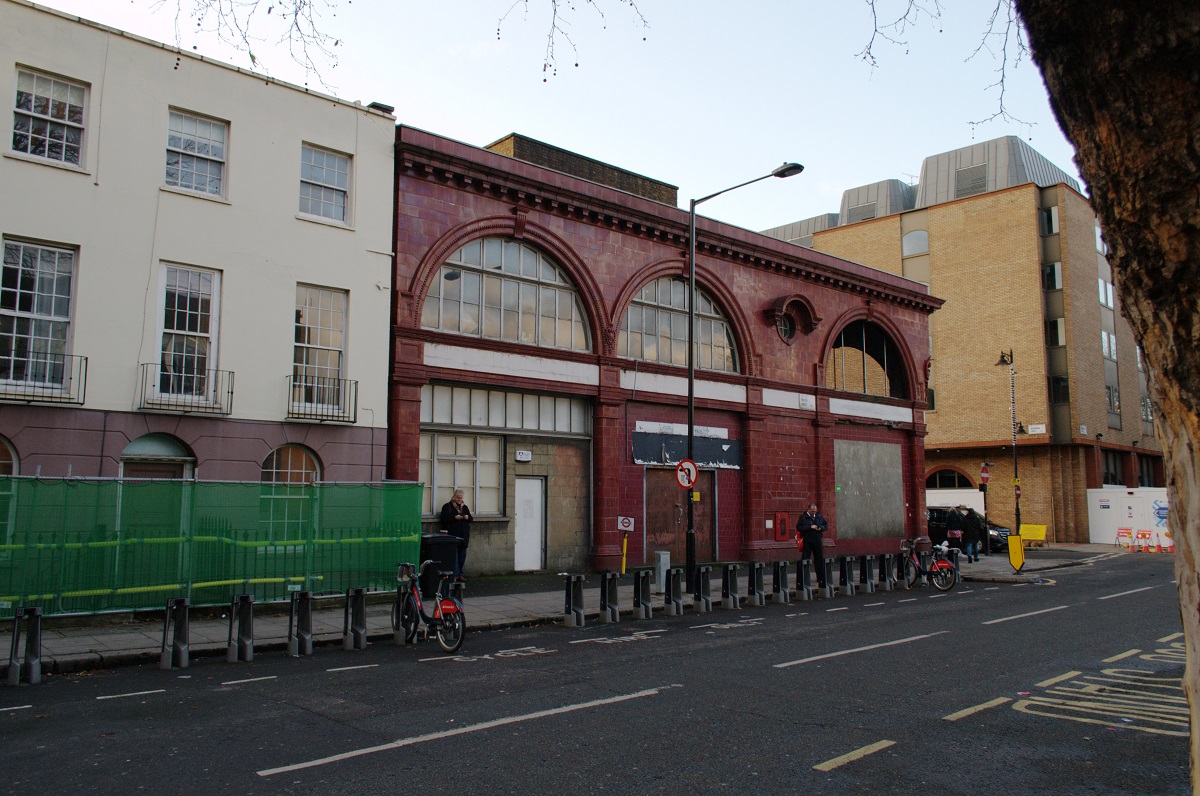
The tour had two distinct parts to it. When we first arrived, we were welcomed into the building in the photo above, which stands on the corner of Melton Street just outside the main Euston Station. This was originally the surface building for the Charing Cross, Euston and Hampstead Railway, an early tube line that opened in 1907 and ran from Euston to Golders Green and Archway. It was designed by Leslie Green, a prolific tube station designer at the time, and looks very similar to most of his other stations (including Down Street). The left hand part of the building had been converted into a sort of reception room for the tours and there wasn’t much to see in there, but after receiving a quick briefing and the obligatory hi-viz vests, we were shown into the centre part, which was more interesting.
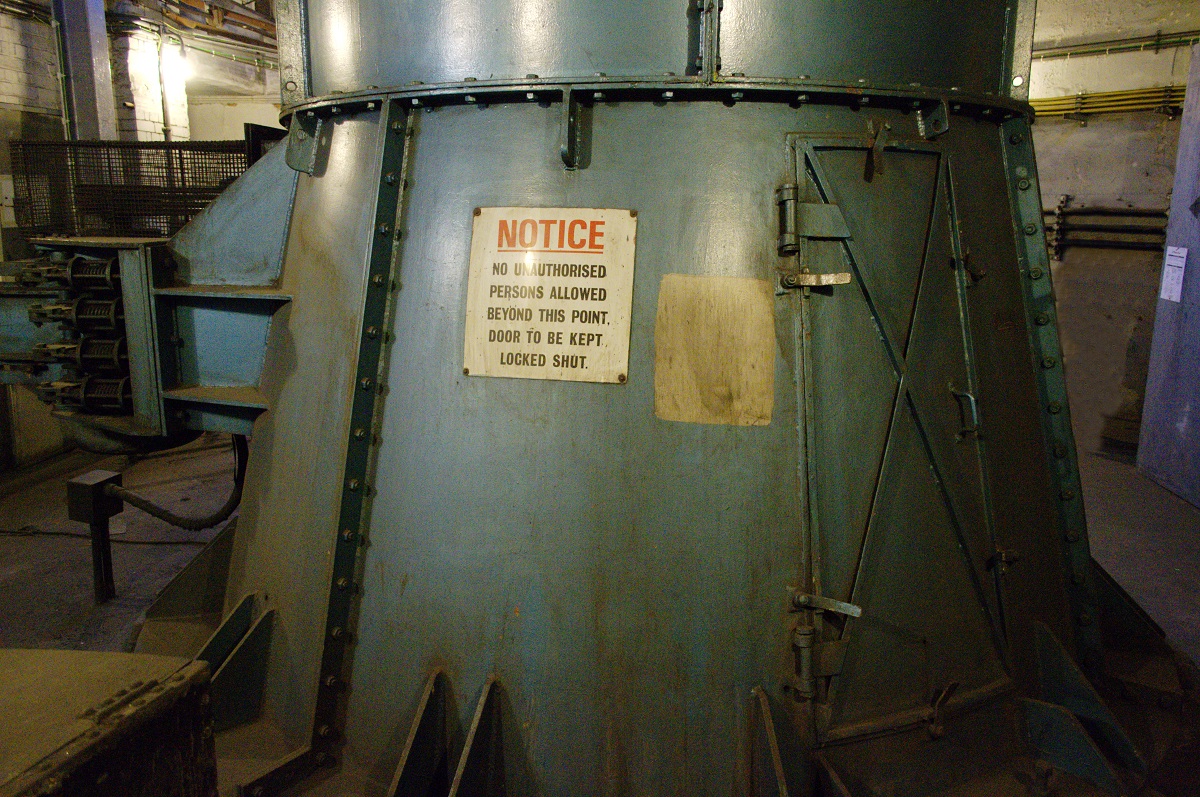
A large (and very noisy!) fan has been installed at the top of the old lift shaft to provide ventilation to the tunnels below. It’s inside the green metal “funnel” in the photo above. There were originally three shafts leading down to tube level from here: the lift shaft, a ventilation shaft, and the emergency exit staircase, but we didn’t see the original ventilation shaft and only the top few stairs of the emergency exit route now remain.
(This building may not be around much longer – it’s apparently in line for demolition as part of the HS2 works around Euston, so I’m glad I got to see it before that happened).
You might wonder why the surface building is no longer used when there’s still a tube station down below. That brings me onto the second part of the tour…
The Disused Tunnels
The Charing Cross, Euston & Hampstead Railway (CCEHR) already mentioned wasn’t the only early tube line to come to Euston. There was also the City & South London Railway (CSLR), actually the earliest deep tube line, which was extended to Euston in 1907 and had a station on the other side of the mainline station. Although the two tube lines were separate, the companies built low level interchange tunnels so that passengers could change from one to the other without having to come all the way up to street level, walk to the other station building and descend back down again. These tunnels included an unusual subterranean ticket office, and also new lift access directly from the mainline Euston Station up above.
Eventually, the two companies merged and both lines became part of what is now the Northern Line. Their surface buildings were closed and from then on access to the tube was through the mainline station. There were further changes when the Victoria Line was built through Euston in the 1960s: the old low level interchange tunnels were closed and blocked off, the platform layout was drastically altered, the lifts were replaced by new escalators, and brand new passenger and ventilation tunnels were constructed. However, some remnants of the old arrangements survived, mostly hidden from public view.
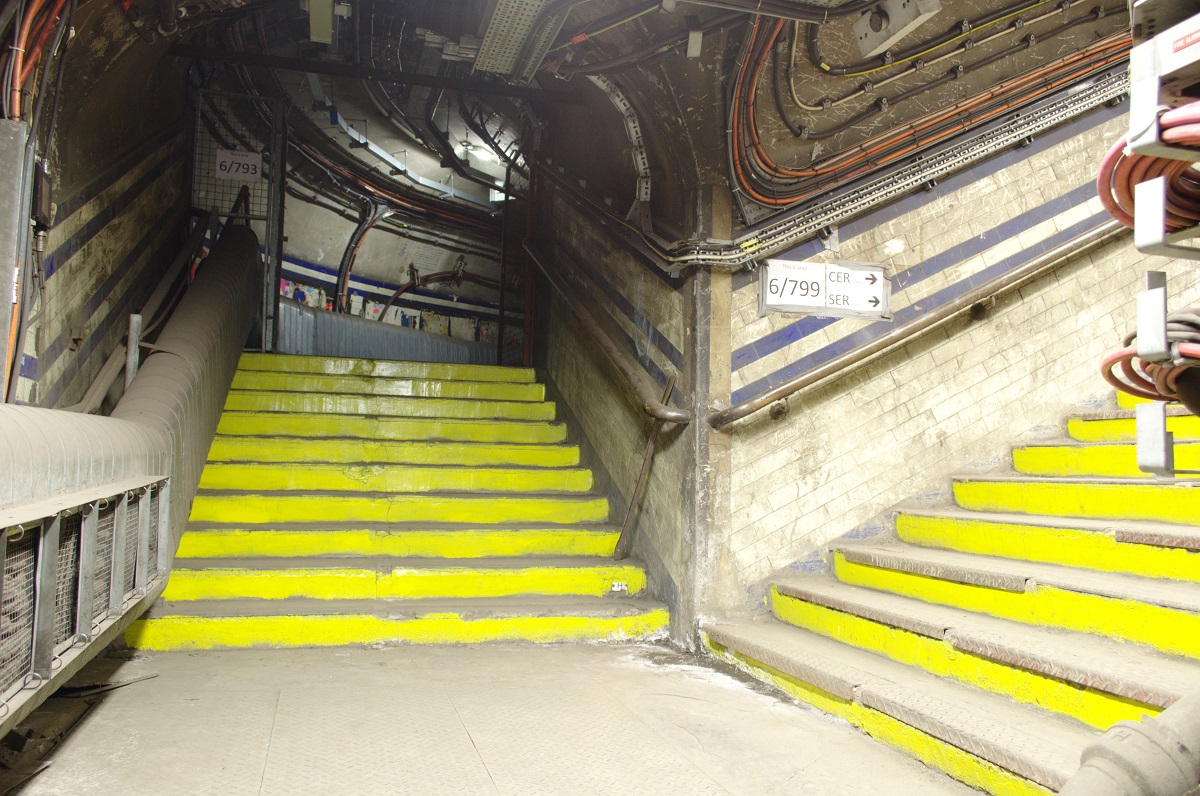
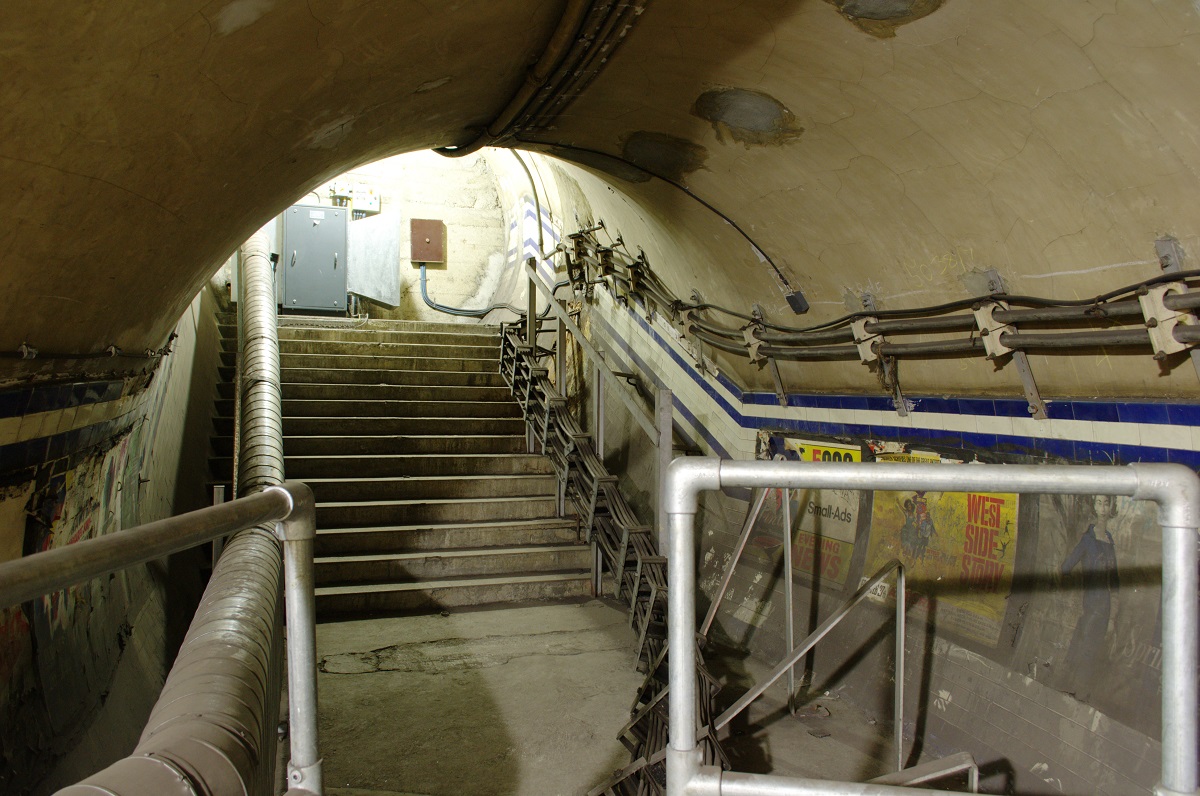
Through an unassuming door at the end of the Northern Line via Bank platform (formerly the CSLR) are the old interchange tunnels. They look strikingly different now from the modern station, with tiling that hasn’t been updated in decades, the remains of old posters stuck to the walls, and cables and other infrastructure all over the place. In the photo above, the stairs straight ahead lead to the interchange tunnel that used to go to the southbound CCEHR platform, passing the underground ticket office, while the stairs to the right used to lead to the lifts and the northbound CCEHR platform.
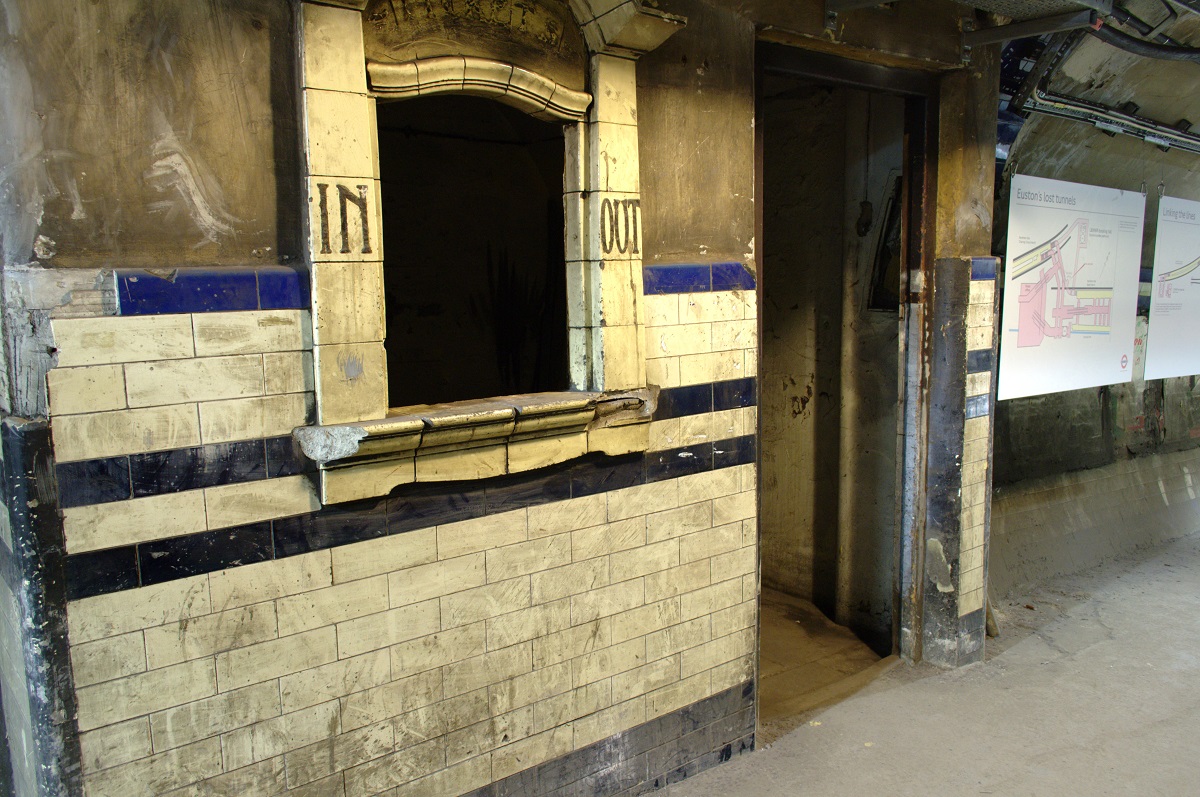
We explored the leftmost tunnel first. A short distance along is the ticket office on the right hand side, complete with classic London Underground ticket window design. I’ve seen other people’s photos from the tour that have the window blocked up, but it had been unblocked by the time we visited, allowing us to take photos of each other pretending to sell tickets to the non-existent passengers in the abandoned passageway.

The tunnel continues for some distance beyond the ticket office. Various modern day equipment has been installed in this section. There’s also a small, but very high, square shaft extending up into the ceiling here.
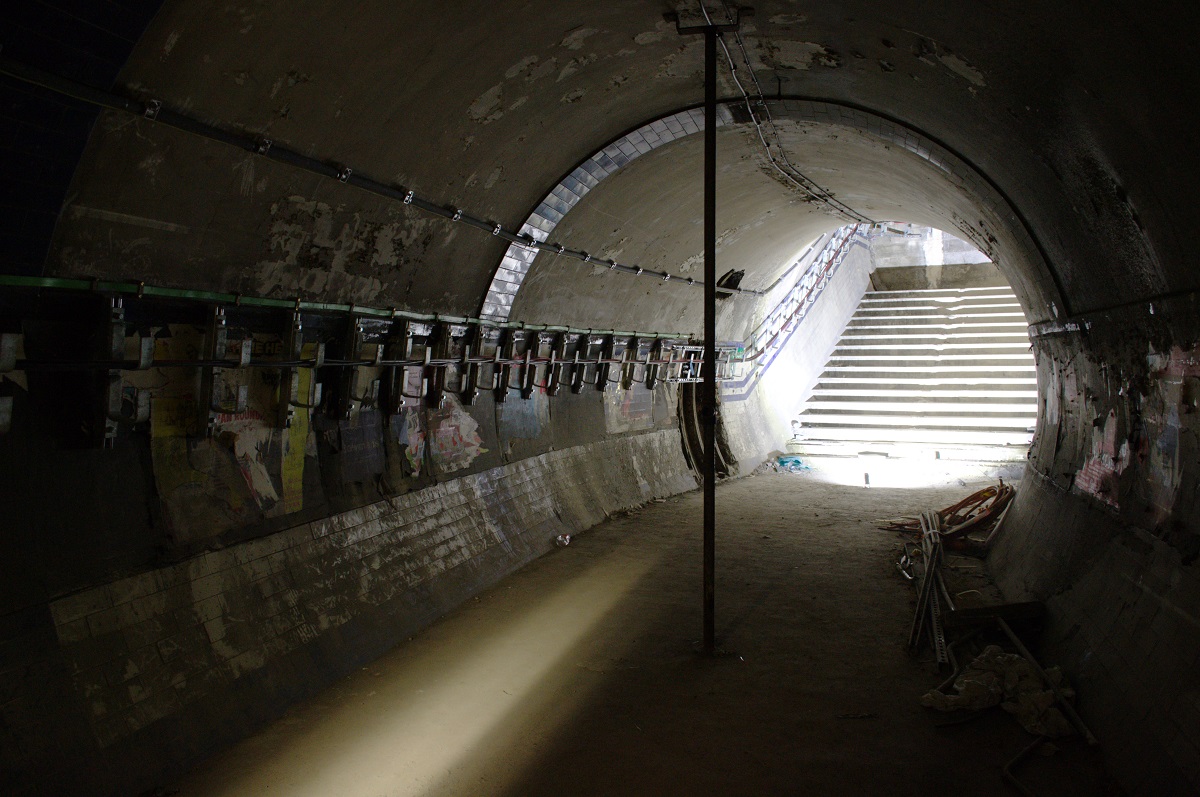
The tunnel rounds a corner and then comes to an abrupt end just at the top of a short flight of stairs that once led up to the southbound CCEHR platform. This tunnel’s function has been taken over by stairs leading down from above, constructed as part of the Victoria Line work. There are some particularly well preserved 1960s posters in this area, including a West Side Story one.

We retraced our steps in order to explore the other connecting tunnel. This one has all kinds of equipment stored along the sides, but there’s still room to walk down the middle. The lower lift lobby can just be seen on the right hand wall in the distance.
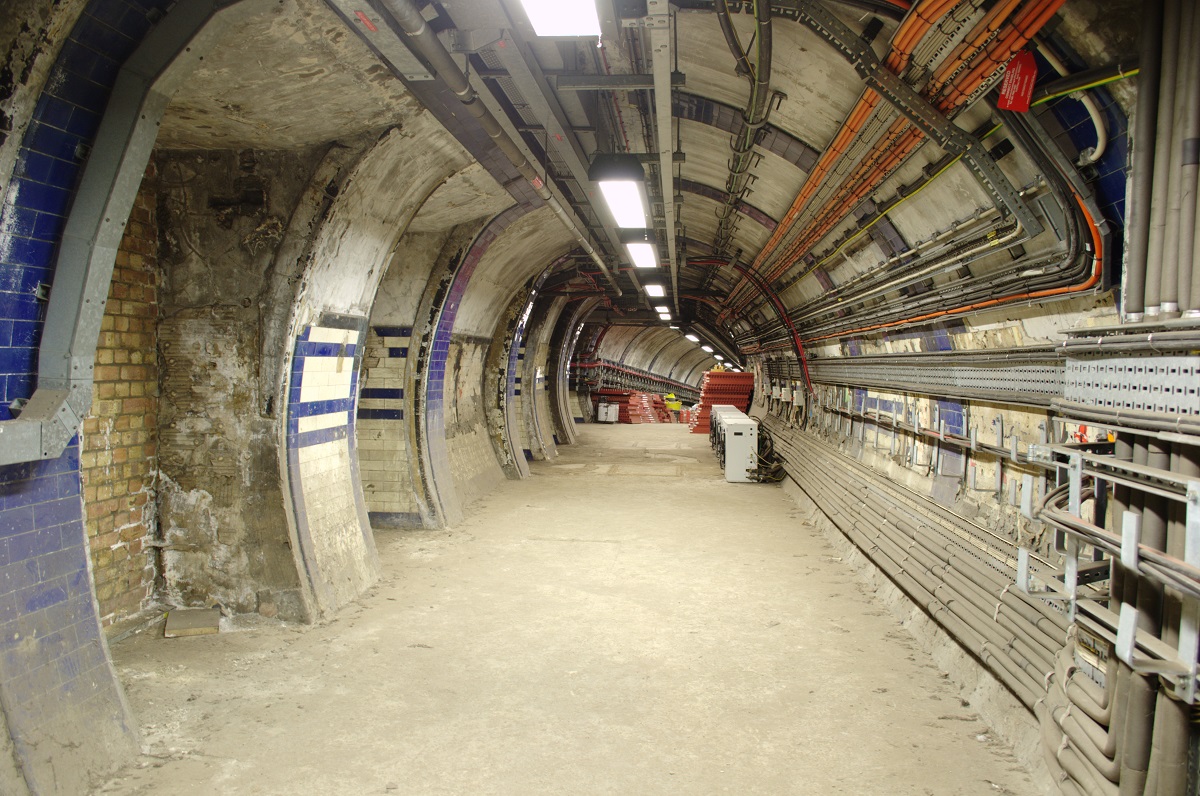
The photo above shows the lift lobby, looking back towards the “storage corridor”. There are two shafts here, each with two openings. The shaft closest to the camera would have housed an emergency exit staircase on one side and a lift on the other, but it’s now been bricked up. The other shaft used to contain two lifts and it’s possible to enter this one – but we weren’t going that way quite yet. Further on on the left there’s also a passage that links round to the rear of the lift shafts.
Like the first connecting tunnel, the second also leads to a dead end at the top of a short flight of stairs. However, in this case it’s necessary to go through a door, along a narrow section where the right hand portion of the tunnel has been partitioned off for some reason, and then through another door in order to get to the dead end. This short section of tunnel had a particularly run-down feel to it, with the bare cast iron segments showing through a hole in the wall on the left, and even the poster that once said “Crystal Palace” now rather forlornly says “Crystal Lace” instead.
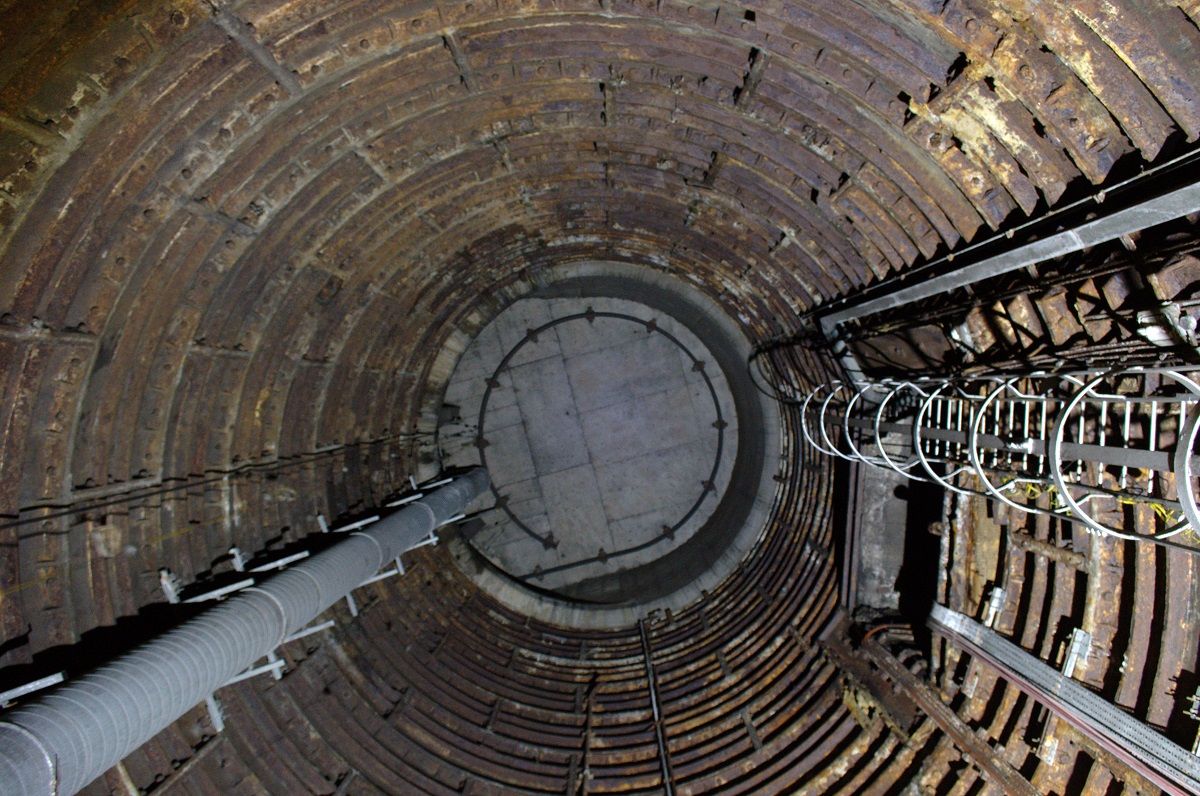
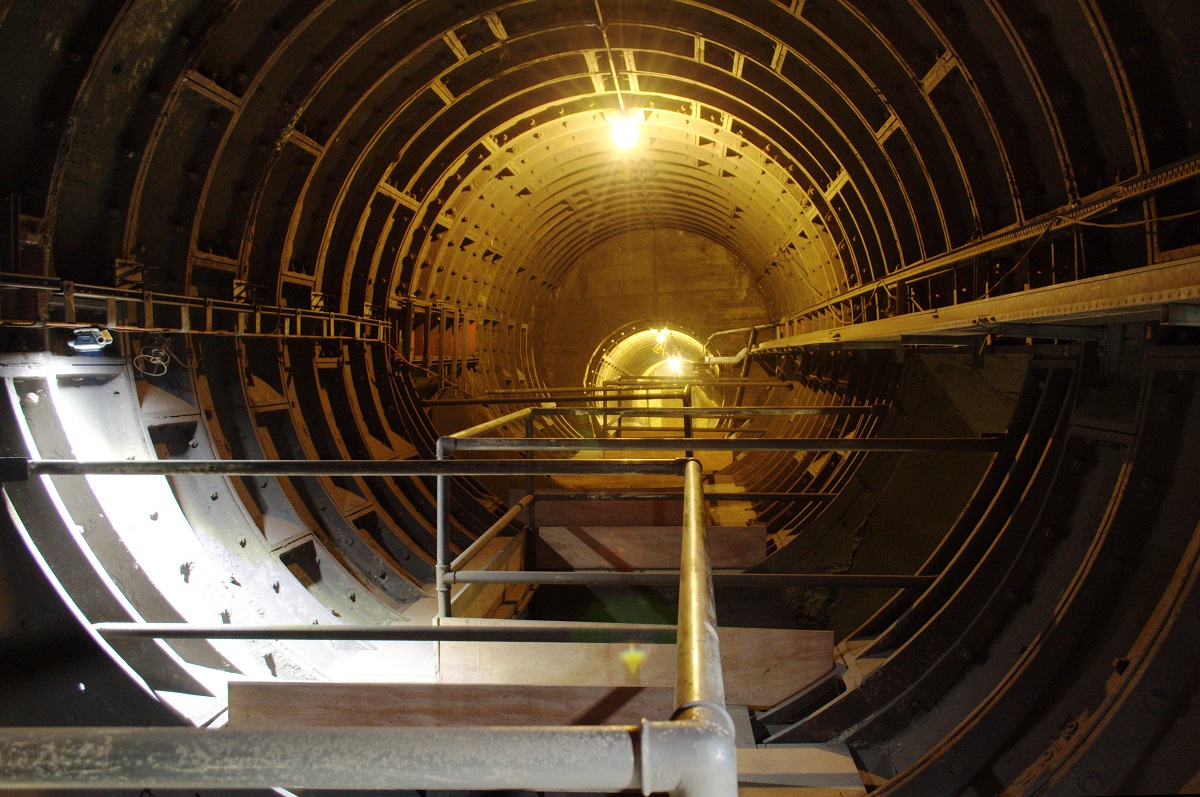
Now it was time to explore the lift shaft. This was one of the highlights of the tour. The photo above doesn’t really do justice to how impressively high it was when standing looking up. This shaft would originally have opened out into the main Euston Station building rather than either of the CCEHR or CSLR buildings.
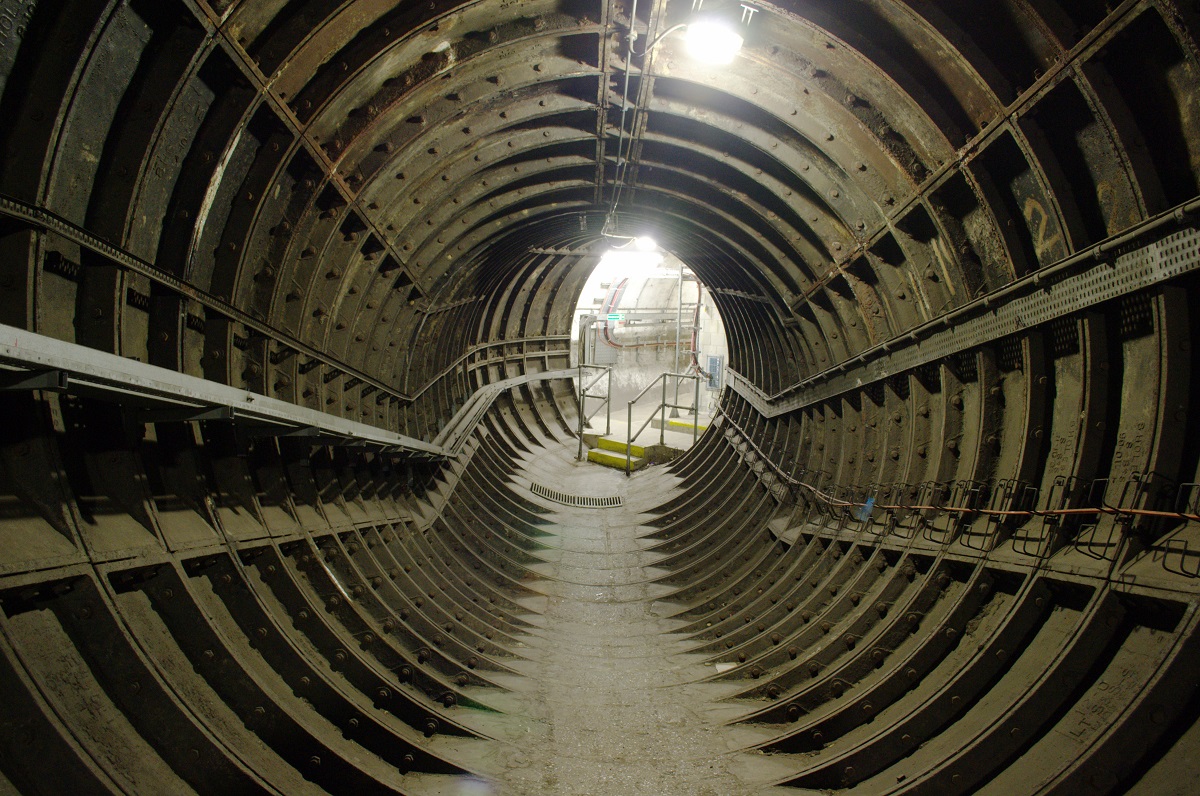
Beyond the lift shaft was another tunnel, this one of quite a different vintage and function to the ones we had seen so far. It’s a ventilation tunnel for the Victoria Line, built in the 1960s and never intended for passengers to walk down. The initial section of this was concrete lined and brightly lit, with a breeze block building housing signalling equipment built along one wall. But beyond here, the tunnel was bare cast iron, built of exactly the same segments as the actual tube tunnels. It was interesting to get a close up look at this as it’s not something you often get to see.

The individual segments have various information embossed onto them, including their date of manufacturer, as one of our guides pointed out to us.
The ventilation tunnel goes up a slope and round a few corners before reaching the chamber in the photo above. There are four openings in the floor here with railings surrounding them, so to walk through the tunnel you have to follow an almost zig zag path. Beyond here the tunnel assumes a smaller bore and continues only a short distance to an emergency exit door.

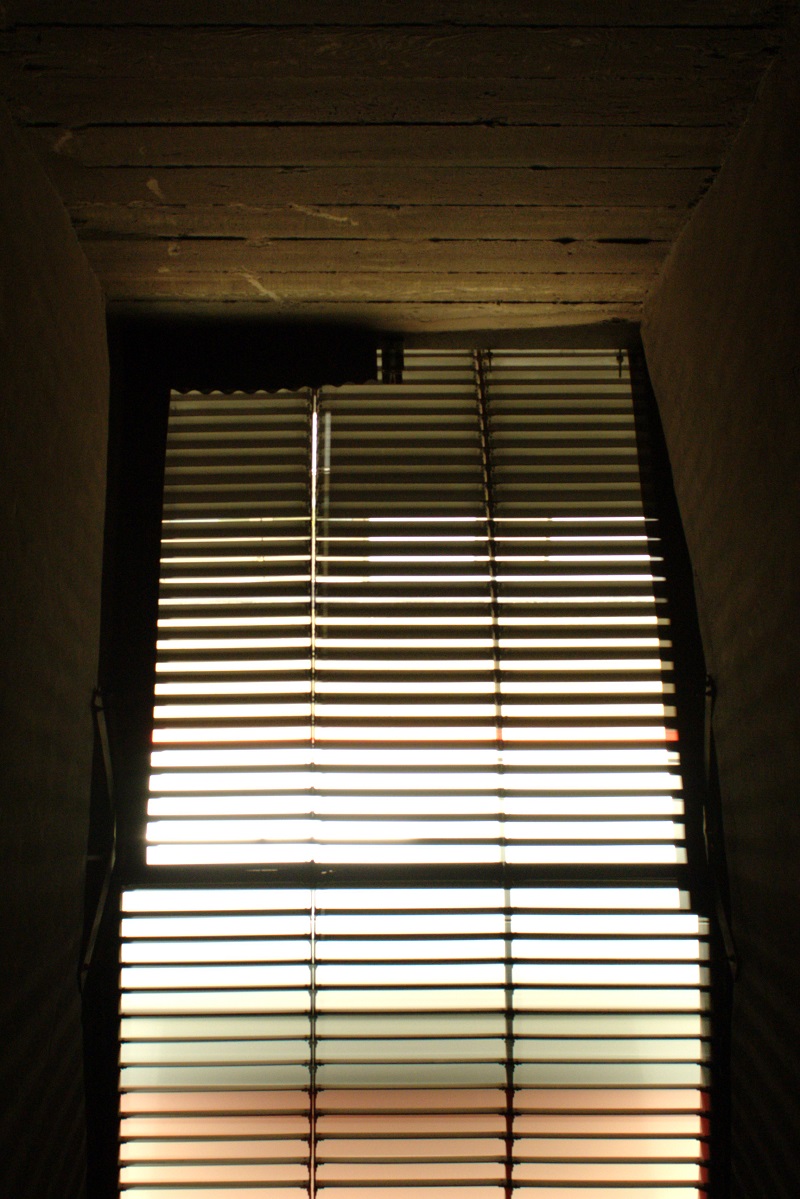
The floor openings lead to ventilation grills in the roof of the Victoria Line platform tunnels down below. It was very strange to see them from this angle, including passengers waiting for their trains completely oblivious to the fact that there were photographers watching them from the ceiling! In the photo above it’s possible to make out one of the rails, the platform edge, the tactile surface and some of the posters on the wall. The photo below shows the slightly blurred view as one of the very frequent trains accelerates out of the station.
The ventilation tunnel was the last part of our tour, so it was time to make our way back out to the modern station and go our separate ways. Although I’m not sure anything else could quite live up to Down Street, this was a very enjoyable few hours and I was impressed at how well they accommodated all of my photography wants! Definitely recommended.
Many more photos on my Flickr.
Leave a Reply